### [微信小程序实战项目之富文本编辑器实现](https://www.prosaas.cn/article/16278)
**Published:** 2022-10-08T09:51:34
**Author:** 5201314
**Excerpt:** 本篇文章给大家带来了关于微信小程序的相关知识,其中主要介绍了关于富文本编辑器的实战示例,包括了创建发布页面、实…
本篇文章给大家带来了关于微信小程序的相关知识,其中主要介绍了关于富文本编辑器的实战示例,包括了创建发布页面、实现基本布局、实现编辑区操作栏的功能等内容,下面一起来看一下,希望对大家有帮助。

【相关学习推荐:小程序学习教程】
## 1\. 实现效果
实现的效果如下图:
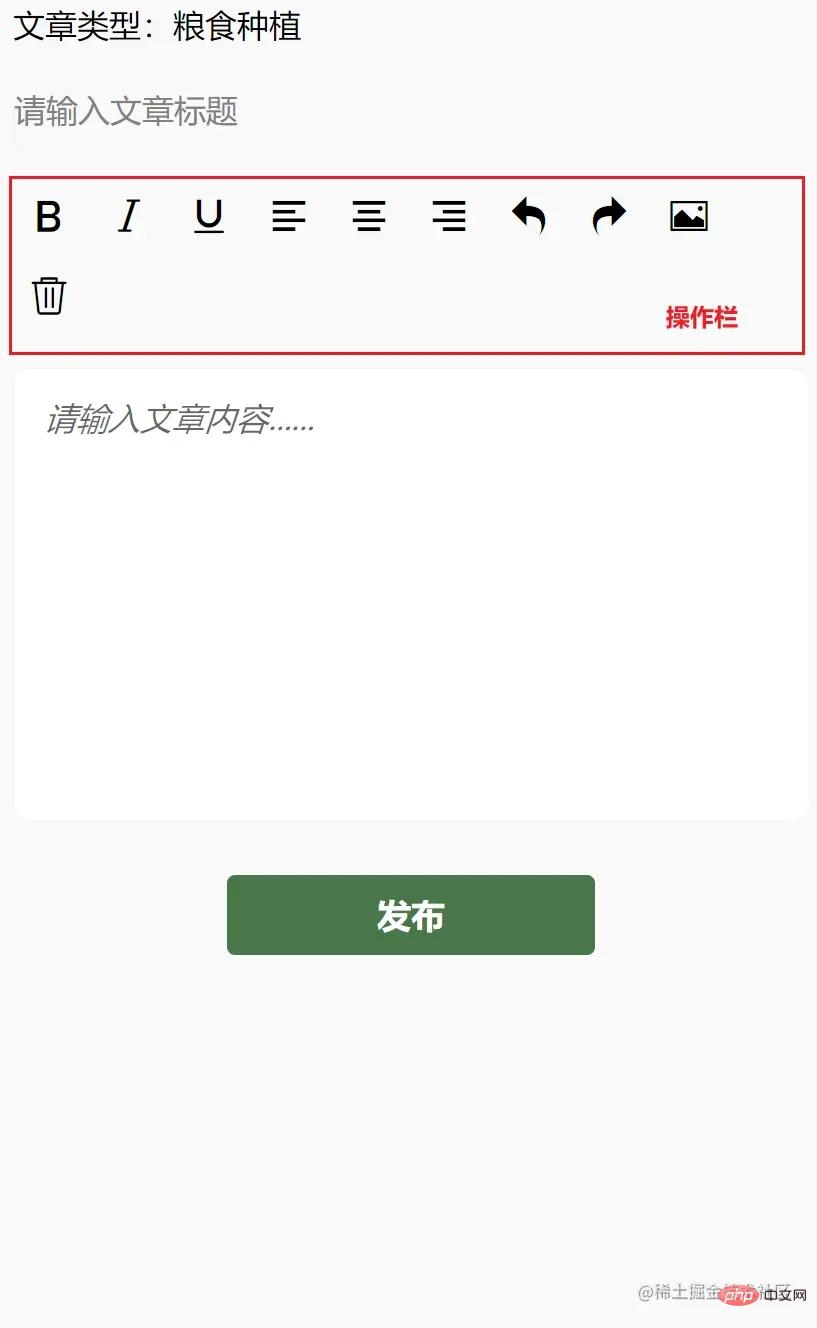
实现的功能点如下:
- 文本加粗、斜体、下划线,对齐方式
- 撤销、恢复、插入图片、删除功能。
## 2\. 创建发布页面,实现基本布局
首先创建发布页面 **article**,在 **app.json** 中通过配置生成页面即可。
"pages": \[
"pages/article/article"
\]
在 **article.wxml** 中,书写结构:
文章类型:{{objectArray\[index\].name}}
发布
在 **article.wxss**,书写基本的样式:
page{
width: 740rpx;
margin: 0 auto;
background-color: #f9f9f9;
}
.title {
border: 1rpx solid #f2f2f2;
margin: 10rpx;
height: 70rpx;
line-height: 70rpx;
border-radius: 10rpx;
}
.picker{
padding: 10rpx;
}
.wrapper {
padding: 5px;
}
.iconfont {
display: inline-block;
padding: 8px 8px;
width: 24px;
height: 24px;
cursor: pointer;
font-size: 20px;
}
.toolbar {
box-sizing: border-box;
border-bottom: 0;
font-family: 'Helvetica Neue', 'Helvetica', 'Arial', sans-serif;
}
.ql-container {
box-sizing: border-box;
padding: 12px 15px;
width: 100%;
min-height: 30vh;
height: auto;
background: #fff;
margin-top: 20px;
font-size: 16px;
line-height: 1.5;
border: 1rpx solid #f2f2f2;
border-radius: 15rpx;
}
.button{
width: 360rpx;
height: 80rpx;
line-height: 80rpx;
text-align: center;
margin: auto;
margin-top: 50rpx;
border-radius: 8rpx;
font-size: 32rpx;
color: white;
background-color: #497749!important;
}
这时我们会发现中间的操作栏图标不显示,我们需要在 **article.wxss** 中头部引入 **iconfont.wxss** 字体图标。 iconfont.wxss 文件获取地址
@import "./assets/iconfont.wxss";
## 3\. 实现编辑区操作栏的功能
本文只实现操作栏的功能,实现富文本编辑,其他文章类型的选择,请自行实现,不难哦!
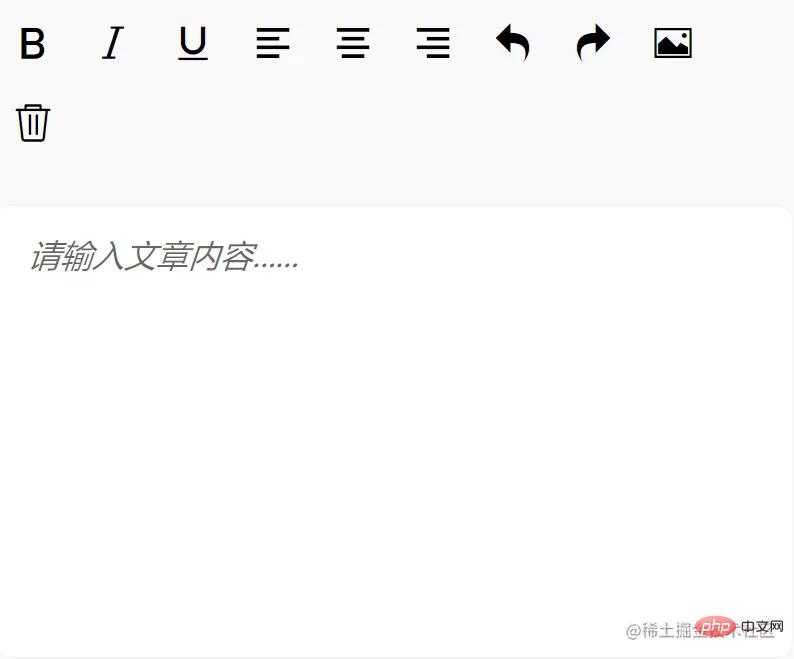
首先,我们需要获取富文本编辑器实例 **EditorContext**,通过 **wx.createSelectorQuery** 获取,我们在页面 **Page** 函数中,创建 **onEditorReady** 函数,用于获取该实例:
onEditorReady() {
const that = this
wx.createSelectorQuery().select('#editor').context(function (res) {
that.editorCtx = res.context
}).exec()
}
然后将该方法绑定到富文本编辑器的 **bindready** 属性上,随着富文本编辑器初始化完成后触发,从而获取实例。
### 3.1. 实现文本加粗、斜体、文本下划线、左对齐、居中对齐、右对齐

我们如何修改文本的样式呢?
- 通过 **EditorContext** 实例提供的**API**:`EditorContext.format(string name, string value)`,进行样式修改。
- `name`:CSS属性;`value`:值。
通过查阅微信小程序开发文档可知,实现上述功能,我们需要的 `name` 和 `value`的值为:
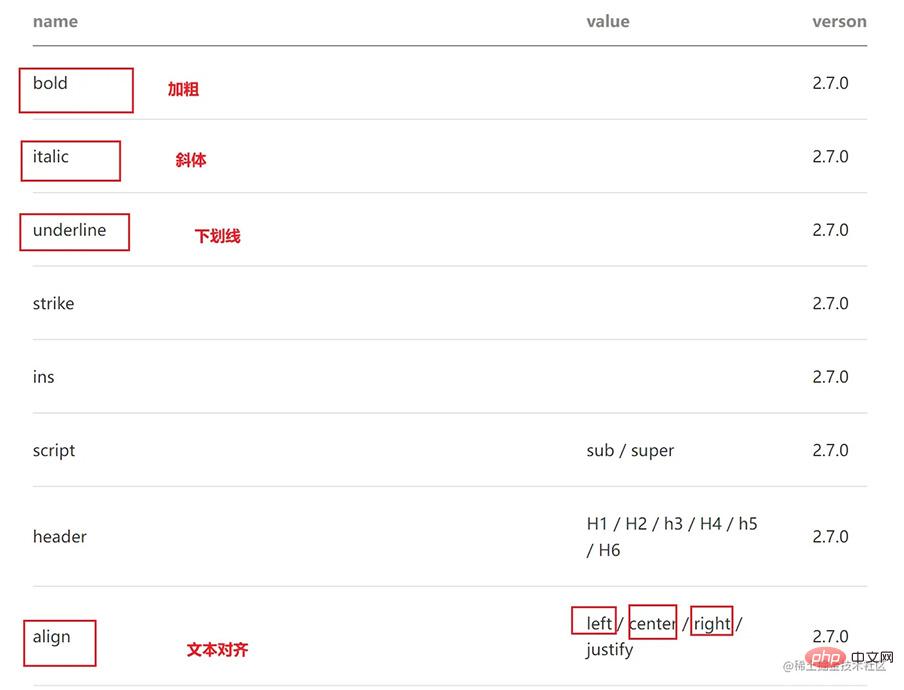
> 那么我们如何通过点击按钮,来修改文本样式呢?
- 首先我们在图标 `` 标签上绑定`name` 和 `value` 属性,填上图标所对应上图的 `name` 和 `value`,无 `value` 的不填即可。
- 然后在父标签上绑定事件 **format**,通过该事件函数,使用 `EditorContext.format` **API** 进行样式修改。
**Page** 函数中的 **format** 函数:
format(e) {
let {
name,
value
} = e.target.dataset
if (!name) return
this.editorCtx.format(name, value)
},
> 问题:当我们点击图标时,改变了文本样式,但是图标的样式没有改变,无法提示我们文本现在的样式状态,那该怎么解决呢?
- 这时候我们就需要动态改变字体图标的样式了,比如点击图标后,改变颜色。
通过查阅 **editor** 微信小程序开发相关文档后,**bindstatuschange** 属性绑定的方法,会在当你通过 **Context** 方法改变编辑器内样式时触发,会返回选区已设置的样式。
那么我们可以在 **data** 中,添加 **formats** 对象,存储点击后的样式属性。然后在点击图标按钮时,通过 **bindstatuschange** 绑定的方法,得到已设置的样式存储到 **formats** 中;在模板渲染时,在`` 的 **class** 属性上,添加 `{{formats.align === 'right' ? 'ql-active' : ''}}`(如文本向右),当你点击了这个图标,那么 **formats** 中就有这个属性了,那么就添加我们的动态类名 **ql-active** 改变图标颜色。
**具体实现**
- 对 **editor** 标签属性 **bindstatuschange** 绑定方法 **onStatusChange**
onStatusChange(e) {
const formats = e.detail
this.setData({
formats
})
}
- 在图标 `` 标签上,添加`{{formats.align === 'right' ? 'ql-active' : ''}}`
- 在 **article.wxss** 添加 **ql-active** 类
.ql-active {
color: #497749;
}
### 3.2. 实现撤销、恢复、插入图片、删除操作

首先在 `` 标签上绑定相应的事件:
**撤销 undo**
调用 **EditorContext API** 即可
undo() {
this.editorCtx.undo()
}
**恢复 redo**
同理
redo() {
this.editorCtx.redo()
}
**插入图片 insertImage**
同理
insertImage() {
const that = this
wx.chooseImage({
count: 1,
success: function (res) {
wx.showLoading({
title: '正在上传图片',
})
wx.cloud.uploadFile({
cloudPath: \`news/upload/${time.formatTime(new Date)}/${Math.floor(Math.random() \* 100000000)}.png\`, // 上传至云端的路径
filePath: res.tempFilePaths\[0\],
success: cover => {
that.editorCtx.insertImage({
src: cover.fileID,
data: {
id: cover.fileID,
role: 'god'
},
success: function () {
wx.hideLoading()
}
})
}
})
}
})
}
**清空 clear**
同理
clear() {
this.editorCtx.clear({
success: function (res) {
console.log("clear success")
}
})
}
【相关学习推荐:小程序学习教程】
以上就是微信小程序实战项目之富文本编辑器实现的详细内容,更多请关注知企PROSAAS其它相关文章!
**Categories:** 后端开发
---