### [浅析小程序中怎么引入高德地图](https://www.prosaas.cn/article/16347)
**Published:** 2021-11-23T11:04:28
**Author:** 5201314
**Excerpt:** 小程序中怎么引入高德地图?本篇文章给大家介绍一下在微信小程序中使用高德地图的方法,希望对大家有所帮助!获得高德…
小程序中怎么引入高德地图?本篇文章给大家介绍一下在微信小程序中使用高德地图的方法,希望对大家有所帮助!
# 获得高德地图用户Key
没有申请key需要先申请,进入高德开发平台 lbs.amap.com/ , 在 开发指南 -> 获取key 中有详细操作步骤,在 控制台 -> 应用管理 -> 我的应用中可以查看我们创建的key。【相关学习推荐:小程序开发教程】
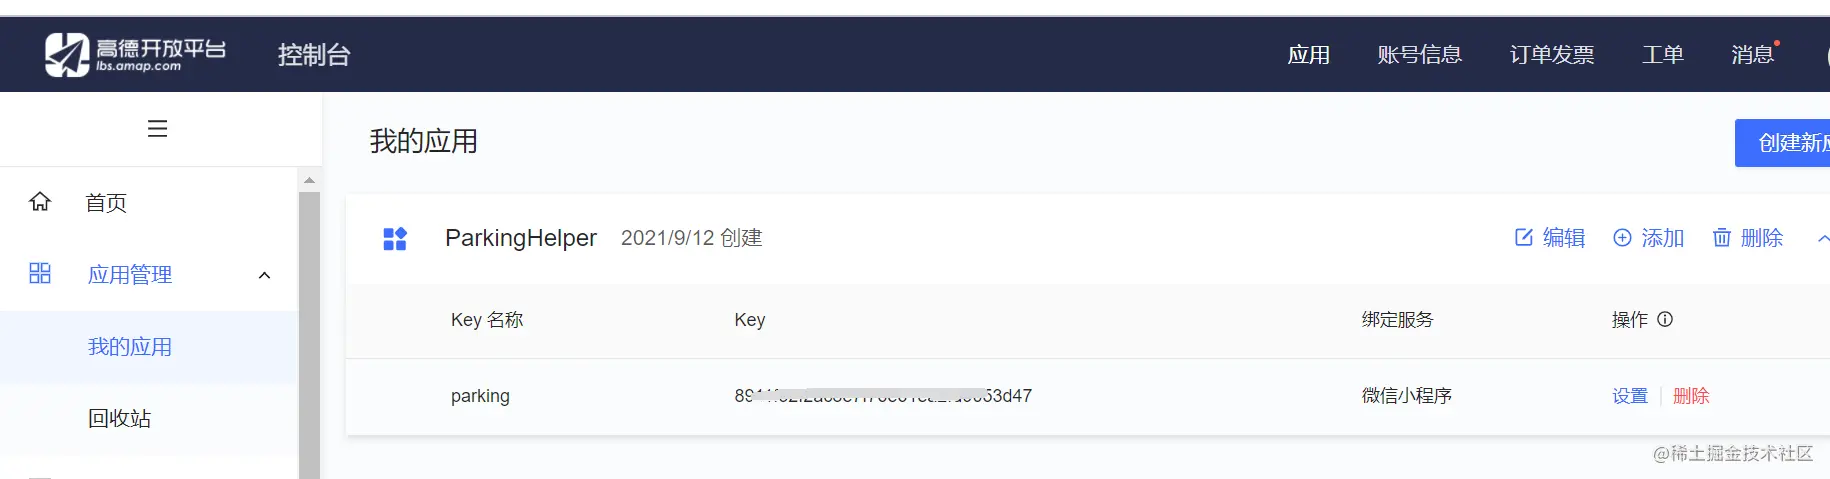
我们可以把key封装在起来,这样就不用每次都找了,在 lib文件夹下新建一个 config.js 文件
var config = {
key: "你的key"
}
module.exports.config = config;
在js里导入 高德的js和key就可以调用高德地图api了
var amapFile = require('../../lib/amap-wx.130.js'); //高德js
var config = require('../../lib/config.js'); //引用我们的配置文件
# 获得当前位置
创建高德地图实例并命名为myAmapFun
var key = config.config.key;
var myAmapFun = new amapFile.AMapWX({
key: key
});
调用 getRegeo 方法
myAmapFun.getRegeo({
success: (data) => {
//保存位置的描述信息( longitude经度 latitude纬度 和位置信息 )
let textData = {};
textData.name = data\[0\].name;
textData.desc = data\[0\].desc
//将获取的信息保存
this.setData({
textData: textData,
longitude: data\[0\].longitude,
latitude: data\[0\].latitude,
// 给该经度纬度加上icon做标记,并调节大小
markers: \[{
latitude: data\[0\].latitude,
longitude: data\[0\].longitude,
height: 30,
width: 35,
iconPath: '../../imgs/locationIcon/site1.png'
}\]
})
},
fail: function(info){
console.log("get Location fail");
}
});
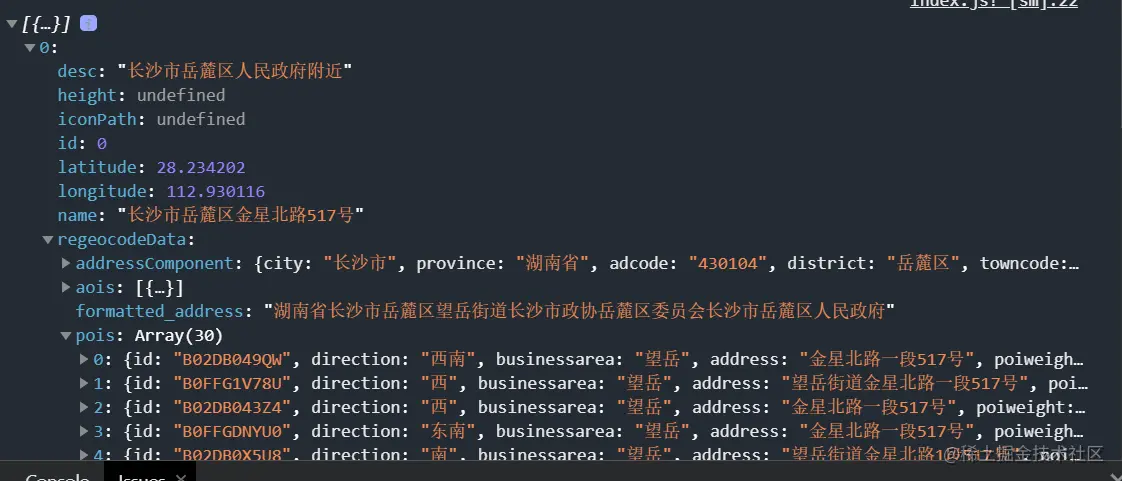
我们可以看下输出成功的data,里面的信息我们根据自己的需要取
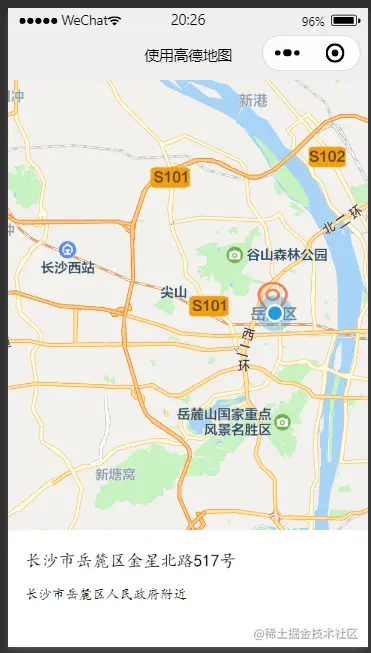
在wxml文件中将地图显示出来,这边设置的是宽度100%,高度400px, `scale`是地图的缩放比例
{{textData.name}}
{{textData.desc}}
红色的标记点就是markers的数据;蓝色的标记点是show-location="true"展示的,但是真机预览就没有了
# 获取附近的点,只取前十个

data: {
# 当前位置经度
longitude: "",
# 当前位置纬度
latitude: "",
# 获取位置的标记信息
markers: \[\],
# 获取位置的位置信息
poisdatas : \[\],
# 简单展示信息使用的
textData: {}
}
调用高德地图的getPoiAround接口根据关键字获取附近信息
get\_current\_PoiAround(){
var key = config.config.key;
var myAmapFun = new amapFile.AMapWX({
key: key
});
// getRegeo 获得当前位置信息(上面有用到过这个方法)
myAmapFun.getRegeo({
success: (data) => {
let textData = {};
textData.name = data\[0\].name;
textData.desc = data\[0\].desc
this.setData({
textData: textData,
longitude: data\[0\].longitude,
latitude: data\[0\].latitude,
})
},
fail: function(info){
console.log("get Location fail");
}
});
// 通过关键词获取附近的点
myAmapFun.getPoiAround({
// 改变icon图标的样式,点击前和点击后的我都暂时设成blue.svg, 如果不设置的话,默认就是一个红色的小图标
iconPath: '../../icon/keshan/blue.svg',
iconPathSelected: '../../icon/keshan/blue.svg',
// 搜索的关键字(POI分类编码),在官方文档https://lbs.amap.com/api/javascript-api/download/ 可以下载查看
querykeywords: '购物',
querytypes: '060100',
success: (data) => {
const markers = data.markers;
const poisdatas = data.poisData;
let markers\_new = \[\]
markers.forEach((item, index) => {
// 只取10个点,超过就continue了,forEach是不能使用break和continue关键字的
if( index >= 10 ){
return;
}
// 将我们需要的markers数据重新整理一下存入markers\_new中
markers\_new.push({
id: item.id,
width: item.width,
height: item.height,
iconPath: item.iconPath,
latitude: item.latitude,
longitude: item.longitude,
// 自定义标记点上方的气泡窗口
// display | 'BYCLICK':点击显示; 'ALWAYS':常显 |
callout: {
padding: 2,
fontSize: 15,
bgColor: "#f78063",
color: '#ffffff',
borderRadius: 5,
display: 'BYCLICK',
content: poisdatas\[index\].name
}
})
})
// 将数据保存
this.setData({
markers: markers\_new,
poisdatas: poisdatas
})
},
fail: function(info){
wx.showModal({title:info.errMsg})
}
})
},
调用getPoiAround接口返回成功的结果
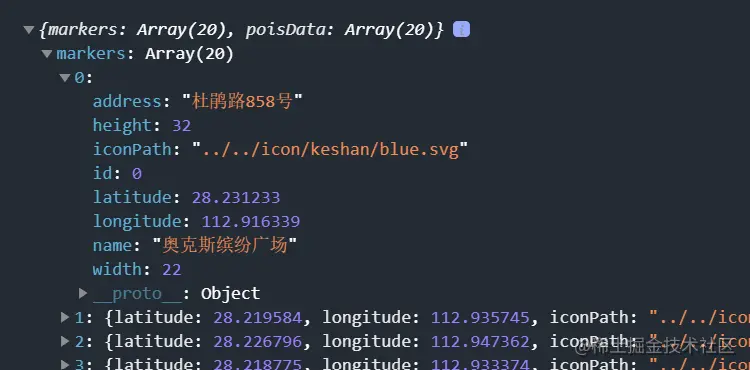
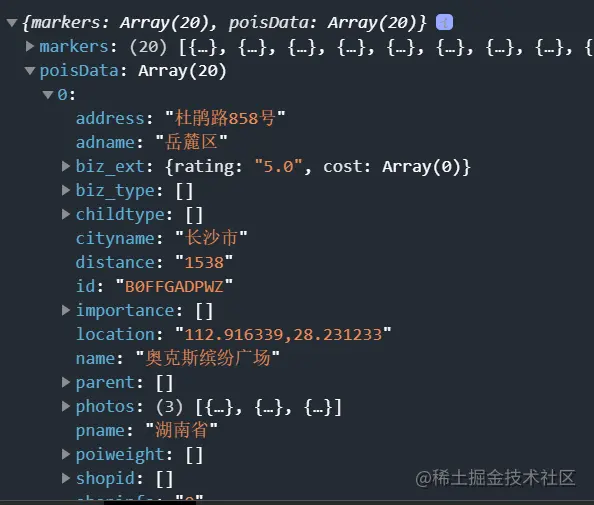
bindmarkertap 激活 makertap图标点击事件,改变map\_text里面内容
{{textData.name}}
{{textData.distance}}m
{{textData.desc}}
makertap 激活showMarkerInfo展示标记点信息,changeMarkerColor改变标记点颜色
makertap(e) {
var id = e.detail.markerId;
this.showMarkerInfo(id);
this.changeMarkerColor(id);
},
之前不是说poisdatas存放该点的位置信息嘛,我们拿到 id 就可以取出来存到textData里面显示了
// 展示标记点信息
showMarkerInfo(i) {
const {poisdatas} = this.data;
this.setData({
textData: {
name: poisdatas\[i\].name,
desc: poisdatas\[i\].address,
distance: poisdatas\[i\].distance
}
})
},
如果是点击的那个位置就把iconPath替换成orange.svg,其余都是blue.svg,并设置被点击的气泡 display为显示('ALWAYS'),将修改后的数据重新保存就可以啦
// 改变标记点颜色
changeMarkerColor(index) {
let {markers} = this.data;
for (var i = 0; i < markers.length; i++) {
if (i == index) {
markers\[i\].iconPath = "../../icon/keshan/orange.svg";
markers\[i\].callout.display = 'ALWAYS'
} else {
markers\[i\].iconPath = "../../icon/keshan/blue.svg";
markers\[i\].callout.display = 'BYCLICK'
}
}
this.setData({
markers: markers
})
},

更多编程相关知识,请访问:编程入门!!
以上就是浅析小程序中怎么引入高德地图的详细内容,更多请关注知企PROSAAS其它相关文章!
**Categories:** 后端开发
---