### [微信小程序中UI与容器组件的介绍](https://www.prosaas.cn/article/17345)
**Published:** 2018-06-26T08:27:07
**Author:** 5201314
**Excerpt:** 这篇文章主要介绍了微信小程序 UI与容器组件总结的相关资料,需要的朋友可以参考下微信小程序 UI与容器组件总结…
这篇文章主要介绍了微信小程序 UI与容器组件总结的相关资料,需要的朋友可以参考下
**微信小程序 UI与容器组件总结**
1.总结与概述
2.容器组件
2.1 组件容器(view)
2.2 可滚动视图容器(scroll-view)
2.3 滑块视图容器(swiper)
**1.总结与概述
**
**1.1 UI组件总结图**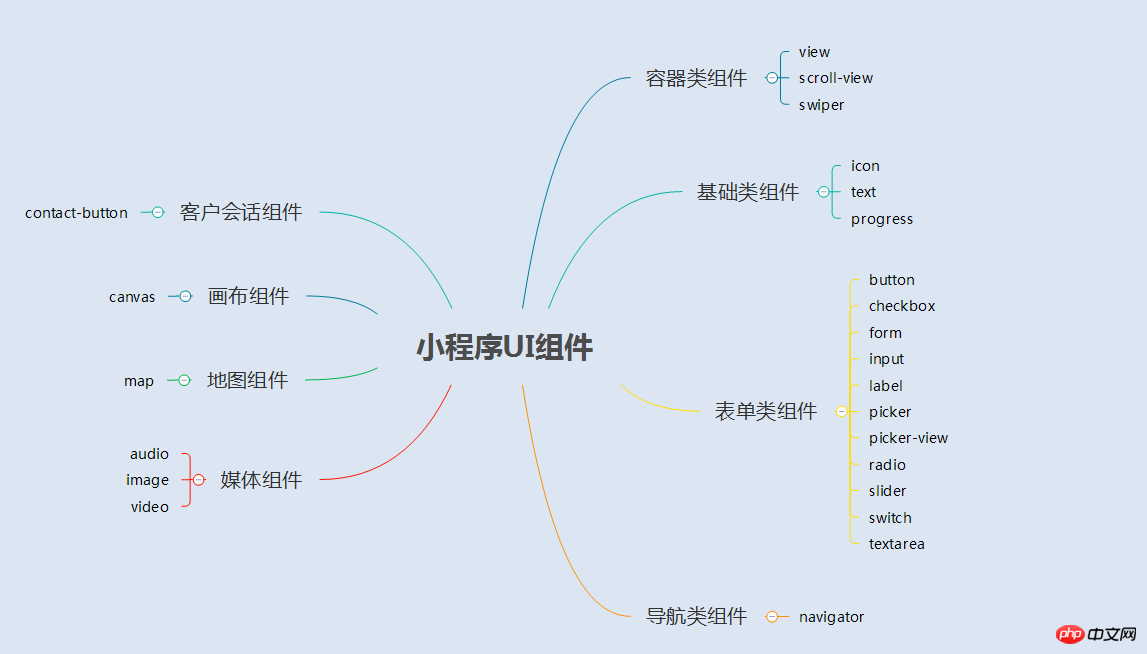
**1.2 概述**
小程序的UI组件也就是定义用户界面的一系列标签,类似于html标签。一个完整用户响应过程:事件触发——>UI组件接收到事件——>触发js函数响应事件——>更新UI
**2.容器组件**
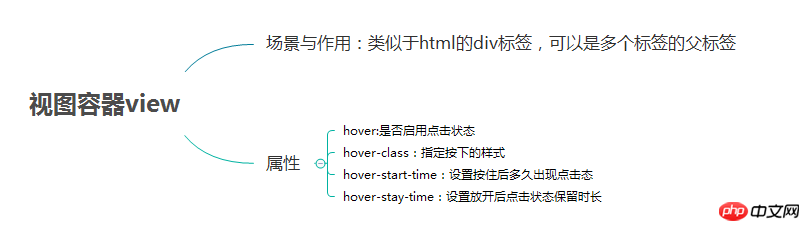
**2.1 容器组件(view)**
(1)总结
(2)例子
效果图

page.wxml
水平布局:
red
green
blue
垂直布局:
red
green
blue
page.wxss
.flex-item-red{
background-color: red;
height: 200rpx;
width: 200rpx;
text-align: center;
line-height: 200rpx;
}
.flex-item-green{
background-color: green;
height: 200rpx;
width: 200rpx;
text-align: center;
line-height: 200rpx
}
.flex-item-blue{
background-color: blue;
height: 200rpx;
width: 200rpx;
text-align: center;
line-height: 200rpx
}
.flex-wrp-row{
flex-direction: row;
display: flex;
margin-left: 10rpx;
margin-top: 20rpx;
}
.flex-wrp-column{
flex-direction: column;
display: flex;
margin-left: 10rpx;
margin-top: 20rpx;
}
.color-text{
color: snow;
font-family: 'Times New Roman', Times, serif;
font-weight: bold;
}
.hover-style{
background-color: black;
}
.row-view-title,.column-view-title{
margin-left: 20rpx;
font-family: 'Times New Roman', Times, serif;
font-weight: bold;
}
/\*重要属性:
display: flex; //与display:box;是类似,是flexbox的最新语法格式,有更好的适配效果
flex-direction: column; //表示子布局垂直布局
flex-direction: row; //表示子布局为水平布局
\*/
**2.2 可滚动视图容器(scroll-view)**
(1) 总结

(2) 例子
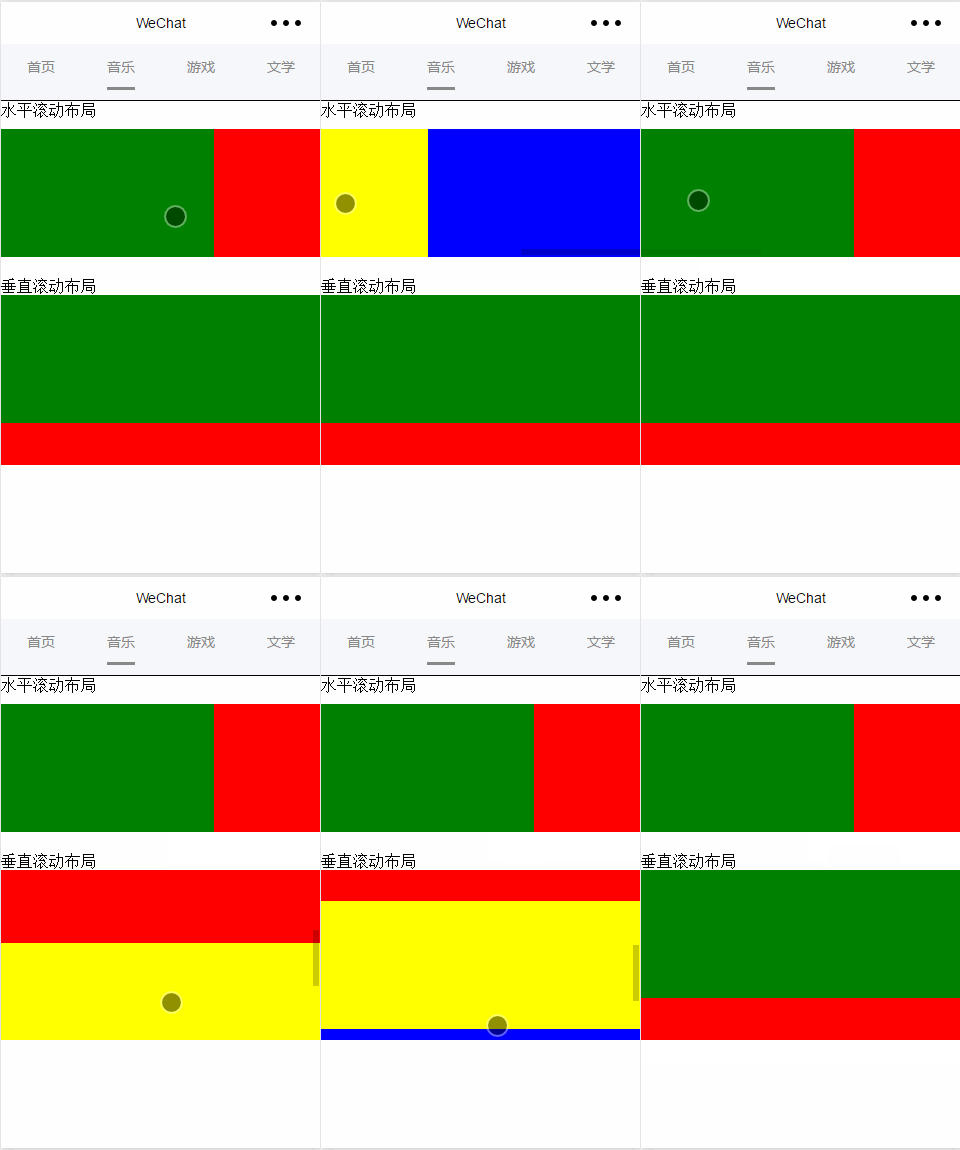
效果图:
page.wxml
水平滚动布局
垂直滚动布局
page.wxss
.x\_green{
background-color: green;
width: 500rpx;
height: 300rpx;
display: inline-flex;
}
.x\_red{
background-color: red;
width: 500rpx;
height: 300rpx;
display: inline-flex;
}
.x\_blue{
background-color: blue;
width: 500rpx;
height: 300rpx;
display: inline-flex;
}
.x\_yellow{
background-color: yellow;
width: 500rpx;
height: 300rpx;
display: inline-flex;
}
.y\_green{
background-color: green;
width: 100%;
height: 300rpx;
}
.y\_red{
background-color: red;
width: 100%;
height: 300rpx;
}
.y\_yellow{
background-color: yellow;
width: 100%;
height: 300rpx;
}
.y\_blue{
background-color: blue;
width: 100%;
height: 300rpx;
}
.scroll-view-x{
display: flex;
white-space: nowrap;
width: 100%;
margin-bottom: 20px;
margin-top: 10px;
height: 300rpx;
}
.scroll-view-y{
height: 400rpx;
}
/\*重要属性:
white-space: nowrap;//设置内部元素不换行显示,与display: inline-flex;属性联合使用才会有水平布局的效果
\*/
page.js
//index.js
//获取应用实例
var app = getApp()
//var color\_index=\['green','red','yellow','blue'\];
Page({
data:{
toview:'red',
},
/\*滑动到左边触发\*/
scrollXToUpper:function(){
console.log('scrollXToUpper')
},
/\*滑动到右边触发 \*/
scrollXToLower:function(){
console.log('scrollXToLower')
},
/\*滑动到顶部触发\*/
scrollYToUpper:function(){
console.log('scrollYToUpper')
},
/\*滑动到左边触发 \*/
scrollYToLower:function(){
console.log('scrollYToLower')
},
/\*滑动触发 \*/
scroll:function(){
console.log("scroll")
},
onLoad: function () {
console.log('onLoad')
var that = this
},
})
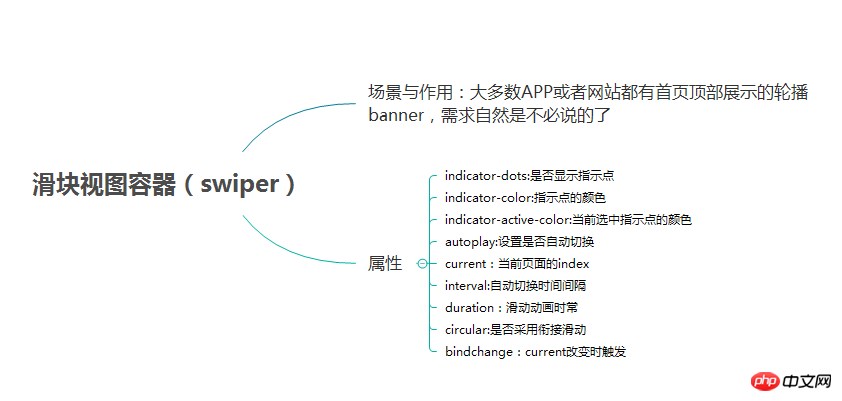
**2.3 滑块视图容器(swiper)**
(1)总结
(2)例子
效果图:
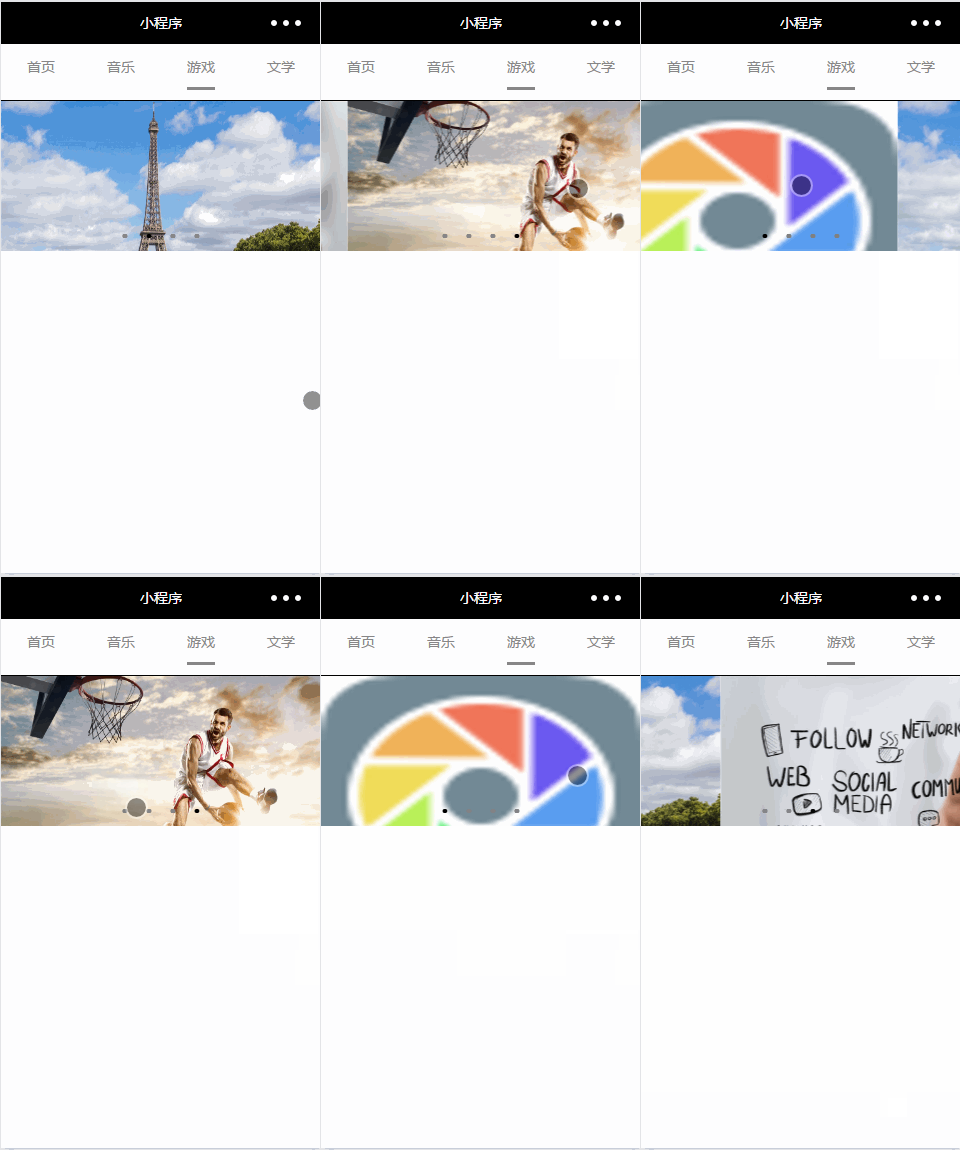
page.wxml
page.js
//game.js
Page({
data: {
imgUrls: \[
'/image/wechat.png',
'http://img02.tooopen.com/images/20150928/tooopen\_sy\_143912755726.jpg',
'http://img06.tooopen.com/images/20160818/tooopen\_sy\_175866434296.jpg',
'http://img06.tooopen.com/images/20160818/tooopen\_sy\_175833047715.jpg'
\],
indicatorDots: true,
autoplay: true,
interval: 3000,
duration: 1000,
current:1,
},
durationChange: function(e) {
this.setData({
duration: e.detail.value
})
},
durationChange: function(e) {
this.setData({
duration: e.detail.value
})
},
itemChangeFunc:function(e){
// console.log(e.target.dataset.current)
console.log(e.detail)
}
})
以上就是本文的全部内容,希望对大家的学习有所帮助,更多相关内容请关注PHP中文网!
相关推荐:
微信小程序button组件的使用介绍
微信小程序 textarea 的使用方法
微信小程序图表插件(wx-charts)的介绍
以上就是微信小程序中UI与容器组件的介绍的详细内容,更多请关注知企PROSAAS其它相关文章!
**Categories:** 后端开发
---