### [关于微信小程序上传图片到服务器的代码](https://www.prosaas.cn/article/17425)
**Published:** 2018-06-23T03:06:38
**Author:** 5201314
**Excerpt:** 这篇文章主要介绍了微信小程序上传图片到服务器的实例代码,在文章给大家补充介绍了微信小程序上传一或多张图片 的方…
这篇文章主要介绍了微信小程序上传图片到服务器的实例代码,在文章给大家补充介绍了微信小程序上传一或多张图片
的方法,本文给大家介绍的非常详细,具有参考借鉴加载,需要的朋友可以参考下
**上传图片到服务器:**
1.先在前端写一个选择图片的区域来触发wx.chooseImage接口并用wx.setStorage接口把图片路径存起来。
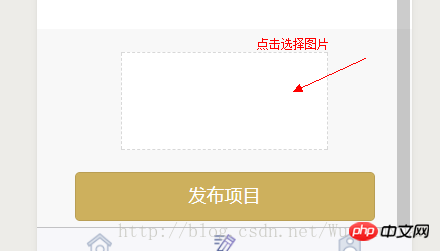
\-wxml
/\*\*选择图片 \*/
choose: function () {
var that = this
wx.chooseImage({
count: 1,
sizeType: \['original', 'compressed'\], // 可以指定是原图还是压缩图,默认二者都有
sourceType: \['album', 'camera'\], // 可以指定来源是相册还是相机,默认二者都有
success: function (res) {
var tempFilePaths = res.tempFilePaths
that.setData({
tempFilePaths: res.tempFilePaths
})
console.log(res.tempFilePaths)
wx.setStorage({ key: "card", data: tempFilePaths\[0\] })
}
})
},
2.使用wx.uploadFile将刚才上传的图片上传到服务器上
formSubmit2: function (e) {
var that = this
var card = wx.getStorageSync('card')
wx.uploadFile({
url: app.globalData.create\_funds,
filePath: card,
name: 'card',
formData: {
'user\_id': app.globalData.user\_id,
'person': e.detail.value.person,
'company': e.detail.value.company,
},
success: function (res) {
console.log(res)
}
})
}
}
},
**PS: 微信小程序上传一或多张图片**
**一.要点**
**1.选取图片**
wx.chooseImage({
sizeType: \[\], // original 原图,compressed 压缩图,默认二者都有
sourceType: \[\], // album 从相册选图,camera 使用相机,默认二者都有
success: function (res) {
console.log(res);
var array = res.tempFilePaths, //图片的本地文件路径列表
}
})
**2.上传图片**
wx.uploadFile({
url: '', //开发者服务器的 url
filePath: '', // 要上传文件资源的路径 String类型!!!
name: 'uploadFile', // 文件对应的 key ,(后台接口规定的关于图片的请求参数)
header: {
'content-type': 'multipart/form-data'
}, // 设置请求的 header
formData: { }, // HTTP 请求中其他额外的参数
success: function (res) {
},
fail: function (res) {
}
})
**二.代码示例**
// 点击上传图片
upShopLogo: function () {
var that = this;
wx.showActionSheet({
itemList: \['从相册中选择', '拍照'\],
itemColor: "#f7982a",
success: function (res) {
if (!res.cancel) {
if (res.tapIndex == 0) {
that.chooseWxImageShop('album')
} else if (res.tapIndex == 1) {
that.chooseWxImageShop('camera')
}
}
}
})
},
chooseWxImageShop: function (type) {
var that = this;
wx.chooseImage({
sizeType: \['original', 'compressed'\],
sourceType: \[type\],
success: function (res) {
/\*上传单张
that.data.orderDetail.shopImage = res.tempFilePaths\[0\],
that.upload\_file(API\_URL + 'shop/shopIcon', res.tempFilePaths\[0\])
\*/
/\*上传多张(遍历数组,一次传一张)
for (var index in res.tempFilePaths) {
that.upload\_file(API\_URL + 'shop/shopImage', res.tempFilePaths\[index\])
}
\*/
}
})
},
upload\_file: function (url, filePath) {
var that = this;
wx.uploadFile({
url: url,
filePath: filePath,
name: 'uploadFile',
header: {
'content-type': 'multipart/form-data'
}, // 设置请求的 header
formData: { 'shopId': wx.getStorageSync('shopId') }, // HTTP 请求中其他额外的 form data
success: function (res) {
wx.showToast({
title: "图片修改成功",
icon: 'success',
duration: 700
})
},
fail: function (res) {
}
})
},
以上就是本文的全部内容,希望对大家的学习有所帮助,更多相关内容请关注PHP中文网!
相关推荐
微信小程序实现点击按钮修改字体颜色的功能
微信小程序之获取当前位置经纬度以及地图显示
微信小程序之多文件下载的简单封装
以上就是关于微信小程序上传图片到服务器的代码的详细内容,更多请关注知企PROSAAS其它相关文章!
**Categories:** 后端开发
---